
How do you usually work on the same project with other developers on your team? The answer to this question for many developers most likely includes a Git hosting service like GitHub.
If you are sharing the same office space with your teammates, you have the benefit of seeing each other one-on-one and fixing issues together in the process. But if you or your teammates work remotely, maybe even in different cities, you may need some extra tools for collaboration.
Xcode has a collaboration feature built in, and there are a few extensions that you can install to add even more features. In this post, I will show you how to start collaborating with other developers on Xcode. But before I get into the detailed step-by-step guide, let's look at what collaboration in Xcode is all about.

Collaboration in Xcode: Meaning and Why It Is Helpful
I will define collaboration in Xcode as the ability to share code you are working on with other developers on your team. Let's say you are stuck with a bug and want someone on your team to have a look. Have you ever tried sharing code via your favorite instant messaging app? The syntax is not highlighted, and indention is lost. This makes the code hard to read for the teammate you share it with. This is definitely the worst way to share code. But there is hope. There is a better way to go about sharing your code with teammates using Xcode's built-in collaboration feature.
Mariia Tintul, a business development director for Lenal EU, said the following in an interview with YouTeam.io:
"For example, you know 50% of the solution for task A, and I know 50% of the solution. Together we have 80% of the solution and start working together on it. Today I am watching your code and suggesting my edits, tomorrow you. This way we’re mentoring each other and create the code together."
A good collaboration culture can help remote teams achieve more in terms of productivity and the growth of team members.
How to Use the Built-In Collaboration Features in Xcode
The built-in collaboration feature I mentioned in the last section provides a graphical user interface (GUI) for using Git and GitHub without leaving Xcode. In other words, you can create a new Git repo, make commits, and push changes without typing commands into a terminal. You can find this feature under "Source Control" in the top navigation bar. If you are hearing Git and GitHub for the first time, don't worry, I will explain both in the next section.
What is Git and What is GitHub?
Before we continue, it is important to know what Git and GitHub are as Xcode's built-in Source Control feature interfaces with both tools in the background.
According to Wikipedia, "Git is a distributed version control system for tracking changes in any set of files, originally designed for coordinating work among programmers cooperating on source code during software development." What this means is that we can keep track of changes made to our project files using Git. Git is available for free and can be downloaded here.

GitHub, on the other hand, is a hosting service for Git. You can host your local Git repositories on GitHub. This allows you to share your code with other developers. You do not need to download or install any application on your computer to use GitHub. You will need a GitHub account to be able to share code to the site. Simply go to github.com and sign up for a free account to get started.
How to Enable Xcode's Source Control Feature
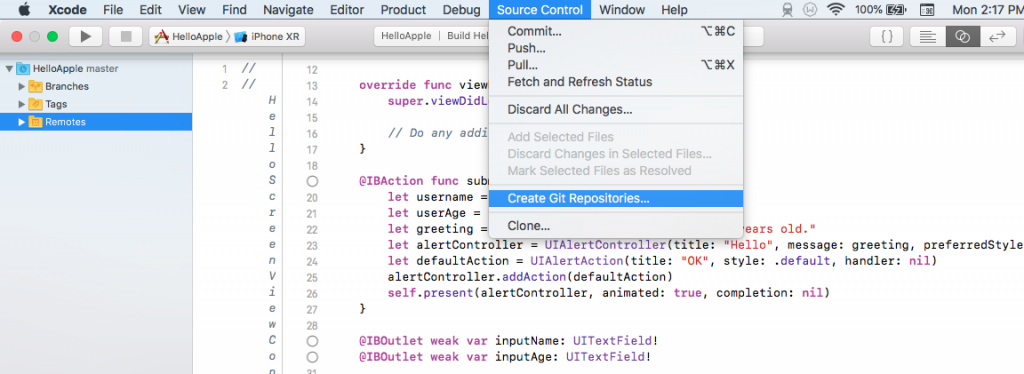
There are two ways to go about this. The first is to enable source control at the new project setup screen. The alternative way is to enable source control later in the project by navigating to Source Control > Create Git Repository.
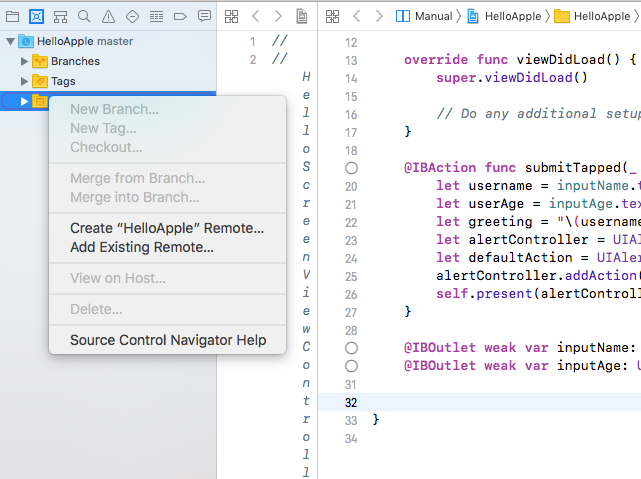
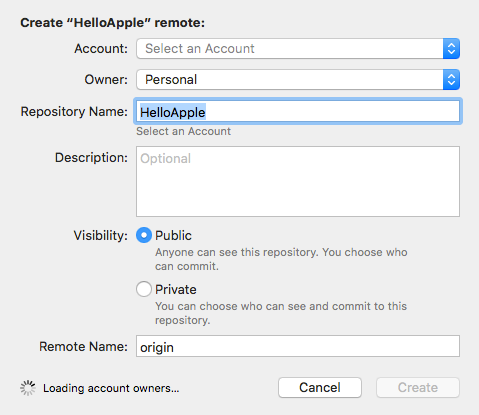
Once you are done setting up a repository for your project, you will need to create a new remote for the project or add an existing remote. To do that, right-click on the Remotes folder that is below the project folder on the left pane.
Select your GitHub account (or add your GitHub account if you haven't done that already) and complete other details about your new remote.
Now you are ready to start sharing your code with teammates. Continue to Source Control and select Commit to save new changes you made to your code. When you are done, go back to Source Control and select Push to send the latest version of your code to GitHub.
You will need to share the link to the remote repository with your teammates so they can view your code.
The Source Control feature in Xcode also lets you create new branches and check out branches without leaving Xcode or typing git commands. This is a pretty cool way to create a branch where you can safely try potential fixes to bugs.
Xcode Extensions for Collaboration
I am not aware of any real-time code collaboration feature on Xcode at the time of this writing. Hence, none of the extensions I list below offer anything like Live Share for the VS Code Editor. However, the following extensions will make sharing code with others on Xcode possible and smarter:
- Xgist: This extension lets you share code to GitHub Gist from inside Xcode. Gist is a service on GitHub that lets you share tiny bits of code with others. Each Gist has a unique URL that you can share with other developers.
- XShared: With this extension, you can copy and paste code with special quotes for formatting on social media apps like Slack and Telegram.
- nef: This is a tool that makes it possible to generate a well-formatted code snippet to an image that can be shared on Twitter and just about anywhere else online.
How to Enable Xcode Collaboration Extensions
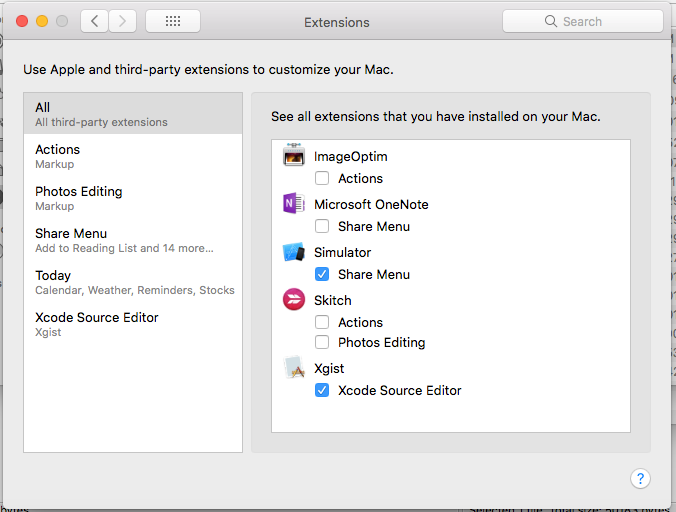
To install Xgist, download a signed copy of the extension here. After download and installation, go to System Preferences > Extensions and enable Xgist.
Any time you want to use the extension, navigate to Editor > Xgist. From there, you can choose either to share an entire file or just a selected portion of code.
The installation process for the other extensions is very similar. I recommend you check the official GitHub repository for download links and more specific instructions.
Wrapping Up
In this post, I covered collaboration on Xcode using the built-in source control feature and extensions. However, none of the two options offers truly deep or live collaboration. I would like to conclude by introducing a tool that shines when it comes to deep collaboration for developers and specifically in Xcode.
There is a super handy tool CoScreen that lets you collaborate with other developers remotely and in real time. With CoScreen, your teammates can view your code and make changes (if need be) in real-time. You can collaborate on Xcode or any other IDE as if you are in the same space.
Want to learn more about CoScreen or see it in action? Watch the video linked here or download the CoScreen app for your macOS here.
If your collaboration needs require more synchronous work, you and your teammates should give CoScreen a try.
This post was written by Pius Aboyi. Pius is a mobile and web developer with over 4 years of experience building for the Android platform. He writes code in Java, Kotlin, and PHP. He loves writing about tech and creating how-to tutorials for developers.